
Kitomba can help you to manage paying your employees their wages and commissions by working with IMS Payroll.
This guide has been designed to help you to understand how Kitomba works with IMS to make your pay days a little easier.
If you are new to IMS Payroll, we suggest you give their Team a call on 06 876 8959 as they are just as friendly and helpful as we are – we checked!
You need to ensure that you have already done the following;
1. Creating Commission Groups in Kitomba
2. Creating Commission Plans in Kitomba
3. Assigning Staff to any Commission Group
If you haven't completed these steps or need a refresh, read our Commissions and Payroll guides in the Knowledge Base
- Commissions guides: https://support.kitomba.com/hc/en-us/sections/115004131528-Commision
- Payroll guides: https://support.kitomba.com/hc/en-us/sections/115004131508-Payroll
Setting up Kitomba
Once you are ready to use both Kitomba and IMS Payroll together, first you will need to tell Kitomba that you are going to use IMS Payroll.
1. Set IMS Payroll as your External Wage Package in the Admin Tab under Preferences.
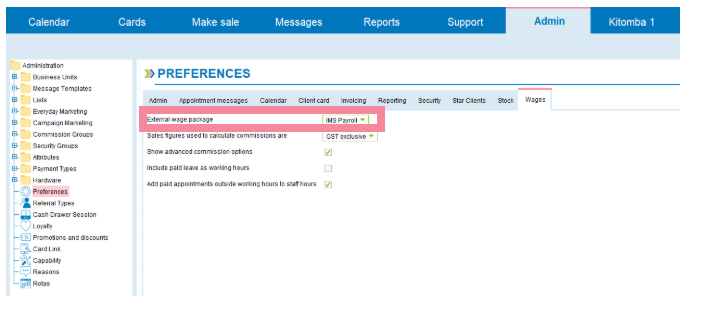
Kitomba Tip:
To be able to use the Import Function in IMS Payroll, you will need to have the Import Module which is $250+GST.
Please contact IMS Payroll for more information.
Wages in IMS Payroll
If you want to use the information generated by Kitomba to work out your wages with IMS Payroll, then you will need to setup IMS Payroll to understand what Kitomba is telling it.
You also need to know how Kitomba is sending information to IMS Payroll so you know what the figures are that you will use.
Employee ID’s
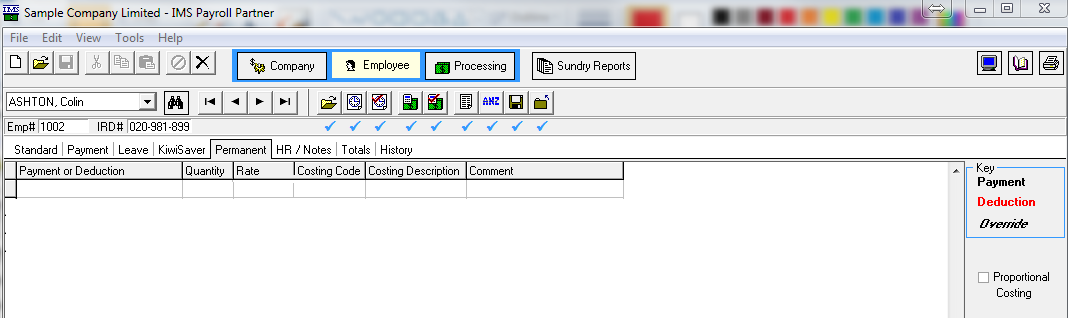
The first thing to do is to click on the Employee section in the IMS Payroll system and IMS will show you the ID number assigned to each of your Staff People.
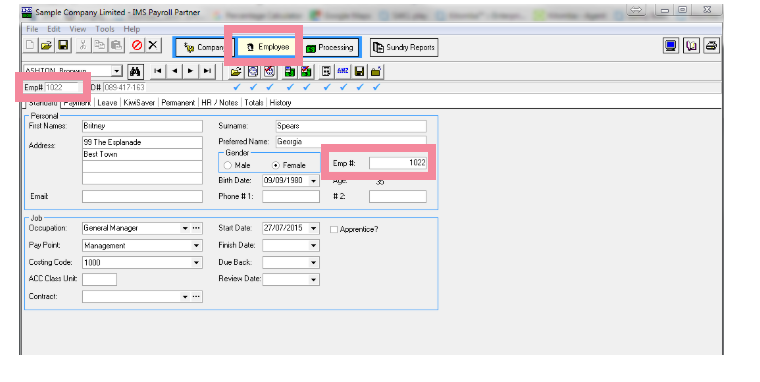
You set the Employee Number manually by putting it into the Emp # box.
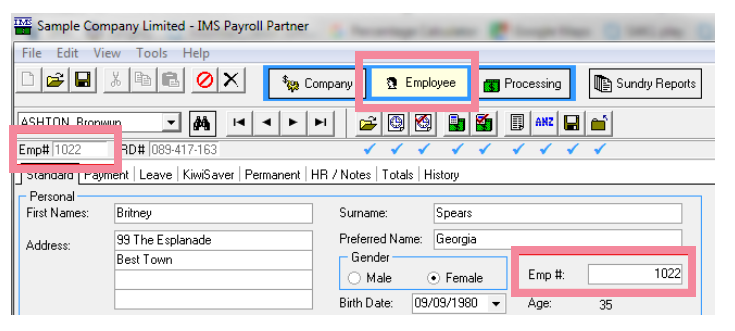
This ID number is the number you will enter into Kitomba on each Staff Persons record in the Kitomba Admin Tab.
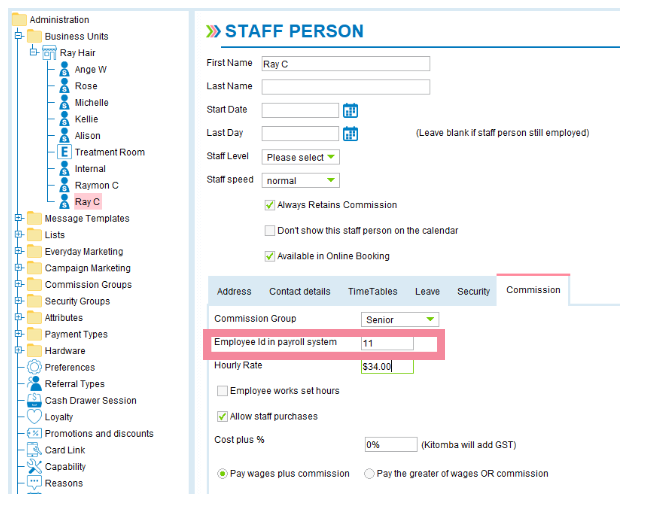
These ID numbers must match to ensure the correct person is paid the correct amount.
Kitomba Tip:
There is a section in Kitomba where you can input Staff Hourly Rates. Please note that this is for the Report purpose in Kitomba only and does not export to IMS Payroll.
To record your Commissions from Kitomba, IMS Payroll uses Payments.
All of your Commission Plans from Kitomba can be totalled up and recorded into one Allowance in IMS. This is what we call the Default Setup.
Default Setup
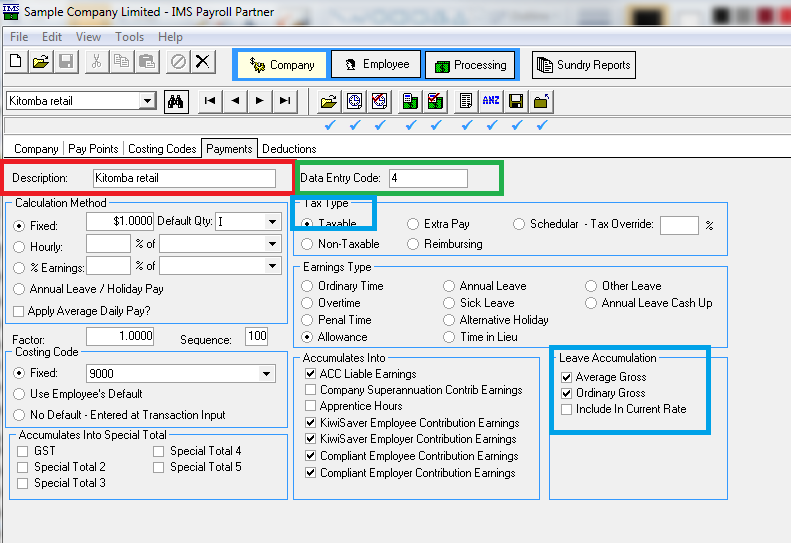
So that IMS Payroll knows what to do with the information it gets from Kitomba you will need to create a new Payment.
Do this by clicking on the Company Controls button and create a new Payment on the navigation button bar.
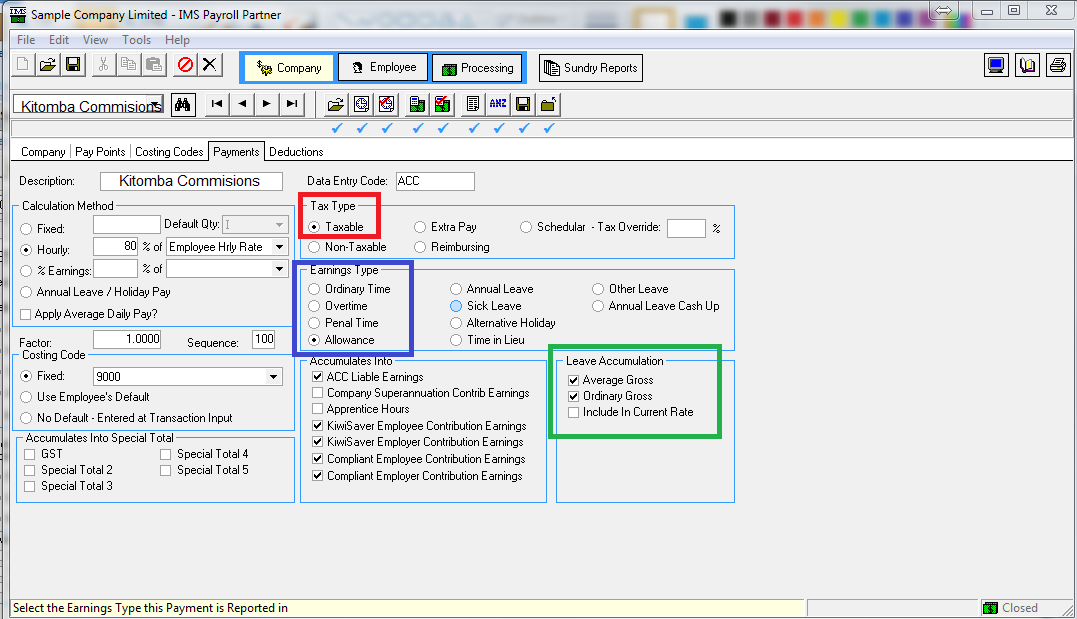
The Tax Type should be set to Taxable.
The Earnings Type should be set to Allowance.
You will need to decide whether you wish Commissions to be added into your staff’s Leave Accumulations. This section allows this.
When you create the Payments, create a new Payment for each Commission Group you have and to save confusion, it is recommended you give the Payment the same name as your Commission Group
Next you will need to set the Fixed Unit Value $1.000 with a Default Qty of I
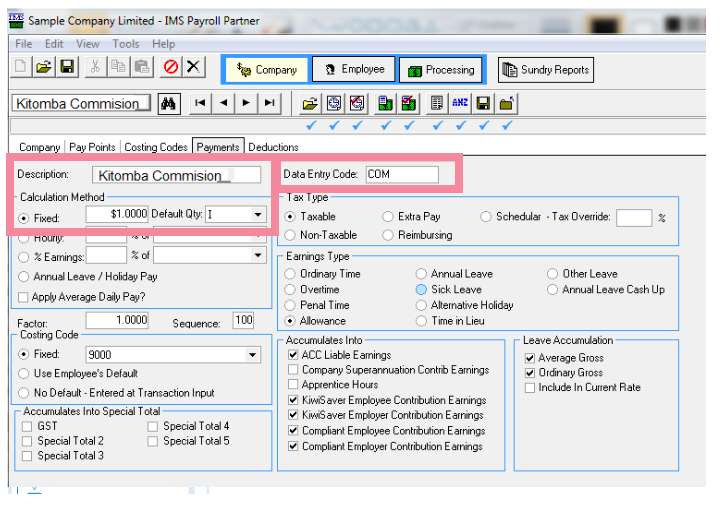
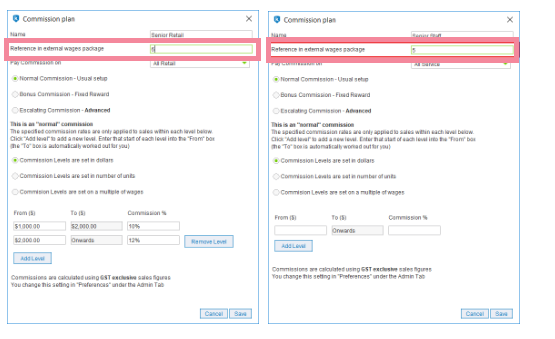
The first Payment you create with IMS Payroll should be given the Reference “COM” as this will be used for all plans that you haven’t given an ID to. You can name it what you want, but here is why we recommend using COM.
An important thing to note, when you are setting up Payments is that in Kitomba when you set up your Commission Plans, you will have seen the field named Reference in external wages package
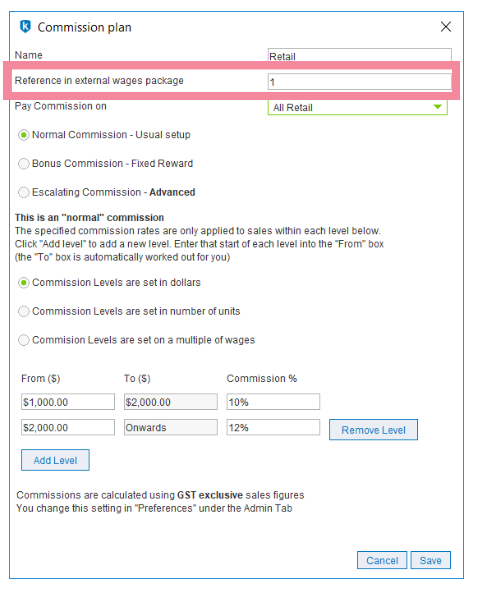
If this field is left blank, Kitomba by default, will include this into the “COM” Allowance in IMS Payroll
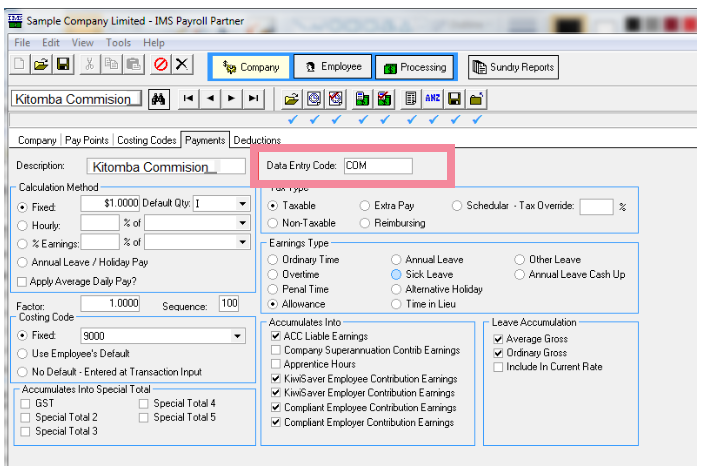
This is the Data Entry Code from IMS Payroll. This number is assigned when you create a Payment and can be edited.
In order for the Import to work correctly, the Reference in external wages package
In Kitomba must match the Data entry Code from IMS Payroll.
If the Reference in external wages package is blank, the Data entry Code from IMS Payroll must be COM for the import to succeed.
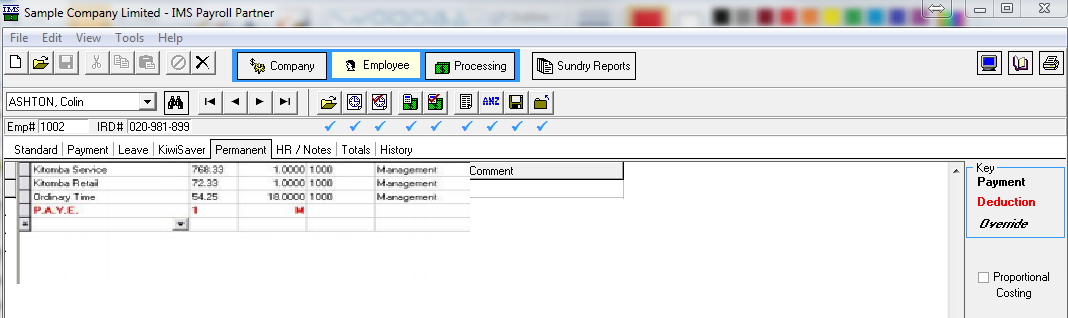
In IMS Payroll also, when you are using the import from Kitomba you will want to ensure that the Permanent Payments section doesn’t have any payment line items that Kitomba provides, as the import from Kitomba will bring this information through automatically.
If this section has Payments registered, you may find they double up when you do the import.
So even though there are no registered Payments for Britney, she will receive the following information from the import
Advanced Setup : Specific Commissions
If you would like a Commission to appear separately in IMS and KitombaTM, you will need to
Create a new Payment in IMS for each separate Commission you have in Kitomba
Then enter the Data Entry Codes into Kitomba.
Don’t forget to set your tax and leave options
You can use one Data Entry Code for multiple commissions on multiple staff.
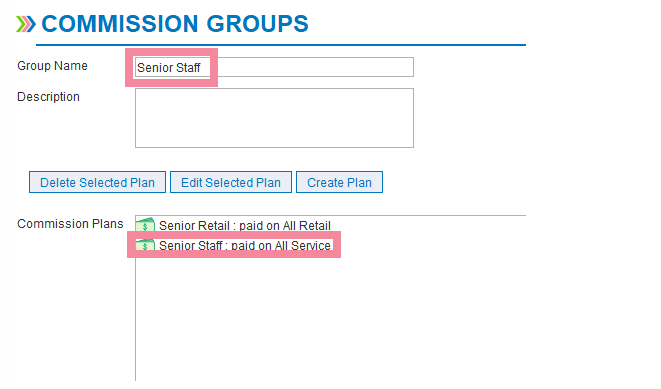
For example, in this system Britney is in the Senior Staff Commission Group in Kitomba
The Senior Staff Commission Group has two Commission Plans.
All Retail with ID 6 All Service with ID 5
Britney can still be paid correctly as any Commission Plans with no ID assigned in Kitomba will be assigned to the Data Entry Code COM in IMS Payroll.
This is useful if you forget to put an ID # into Kitomba.
IMS Payroll will let you use one Payment Data Entry Code for multiple commissions with different values from Kitomba.
In the KitombaTM Wages Summary you will see a detailed list of Commissions with their specific names. But in IMS Payroll you are only dealing with the final figures which means even if you assign two staff people from two different KitombaTM Commission Groups to the same Payment Data Entry Code they will still be paid the correct amounts.
Using a setup similar to this one will make it easy for you to run reports on the total Retail Allowances and total Service Allowances you have paid to staff over a period.
So you can also assign Kelly (who is part of the Junior Staff Commission Group in Kitomba) the identical list of Allowances in IMS Payroll.
In this example, Kelly is in the Junior Staff Commission Group in Kitomba
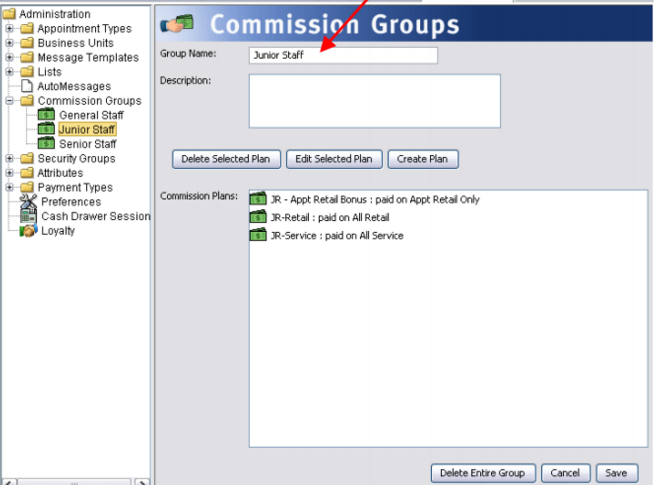
This Junior Staff Commission Group has three Commission Plans. As well as the usual Retail and Service Commissions, the Junior’s get an extra bonus if they sell Retail to a booked client they are Servicing.
Running the Wages Report
When you get to the end of your pay period, you will need to run the Wages Summary.
Set the Report Dates to reflect your pay period.
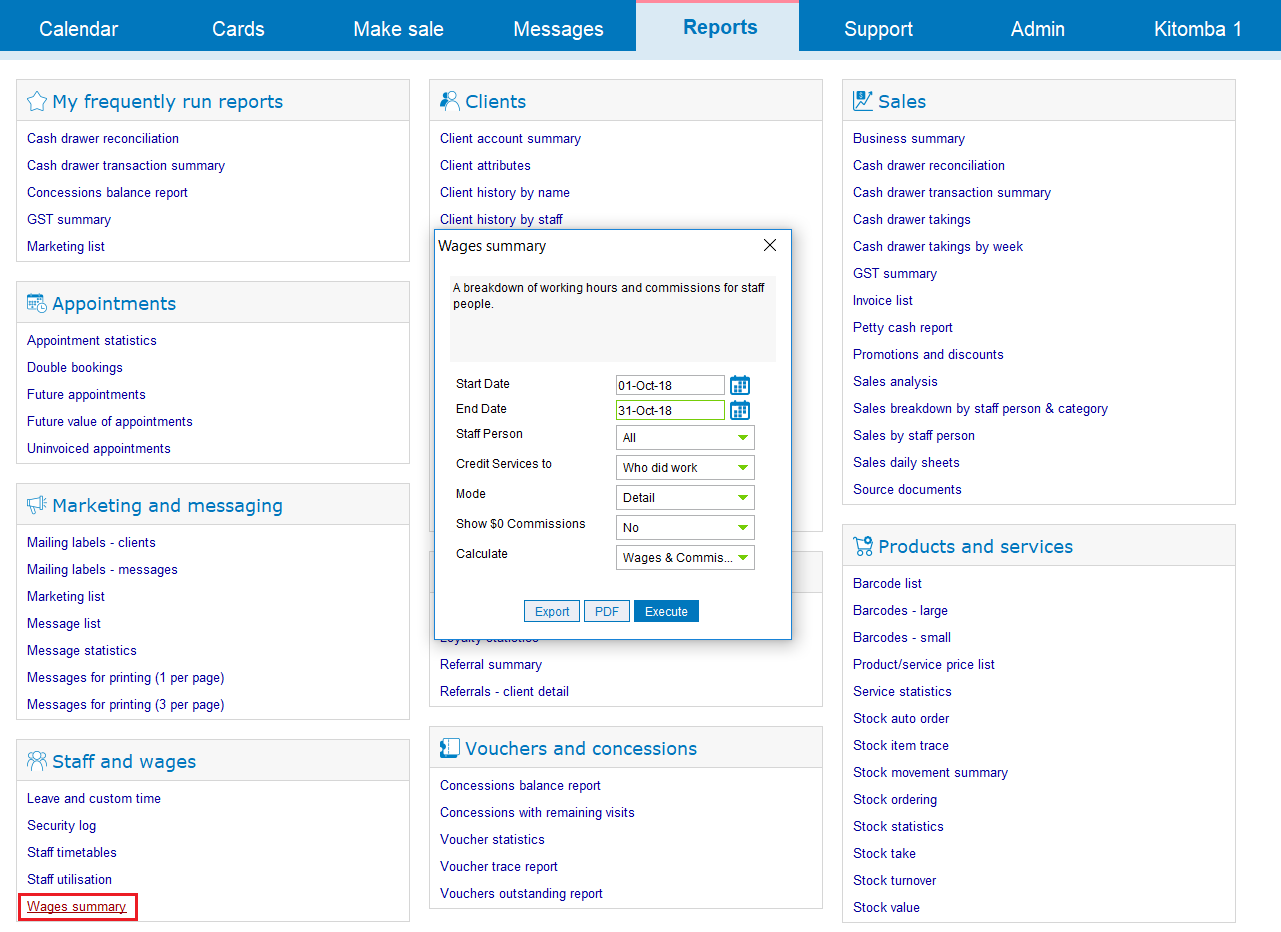
Click Execute and the Report will be shown on screen.
Check your figures and click Export to put this in a format that IMS can read and give the file a name.
When you save your file, it is advised that you save it in a folder that you can find again easily.
You will have to give your exported file a name and it will be a csv file.
Importing the Commissions
Now that you have setup IMS Payroll and Kitomba to communicate, after clicking on Payroll Processing and opening your pay period, you can then import your Wage Summary in the Timesheet Screen by clicking on Import
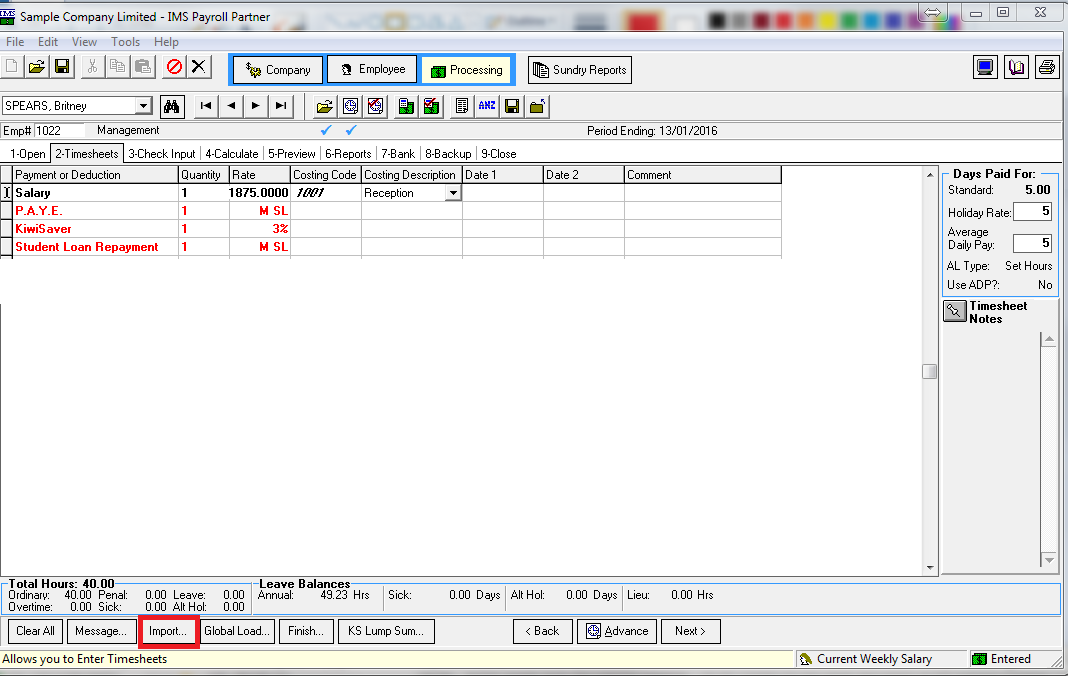
When the Import Dialogue box appears, you should check that it is set to Match Employees by Employee Number
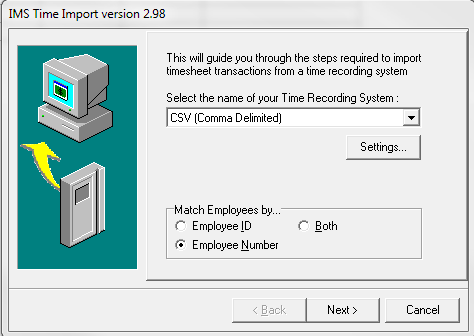
Select the next button
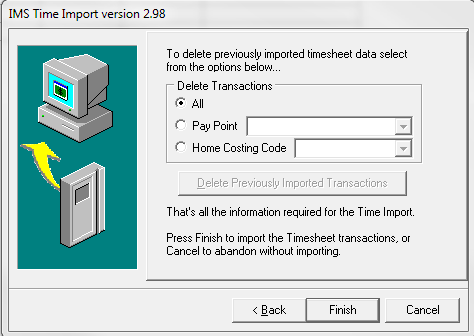
Select the Finish button.
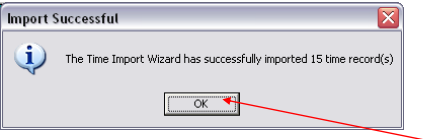
When you see the success dialogue above, the Import has succeeded and you can click OK.
With a successful import, you will see your employee records should now have all of the correct hours, hourly rates and commission figures updated.
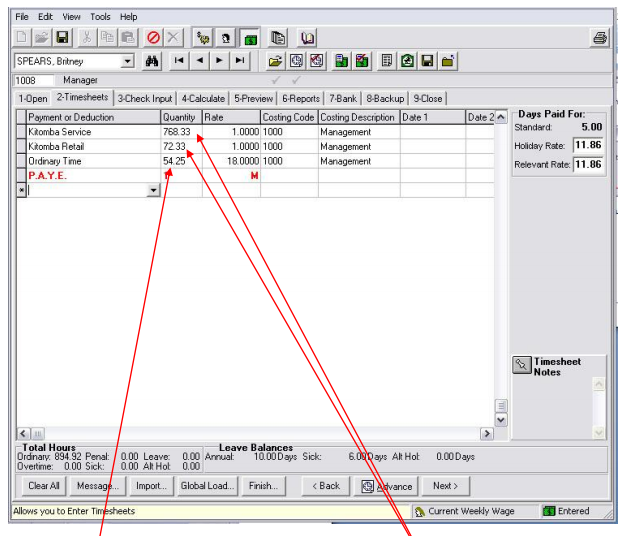
You will see that after the import, the hourly rate is filled in, Kitomba will have also brought in the number of hours your staff have worked and their commission amounts.
Once you have completed the pay adjustments, continue your normal process including bank transfers/direct credits, payslip printing and Filing Pay’s.
Comments
0 comments
Please sign in to leave a comment.